 Loading... Please wait...


Categories
Categories
Brands
Brands
DIY Distressed Boyfriend Jeans
Posted by on
DIY Distressed Boyfriend Jeans
We have searched the web high and low to gather the best tips to achieving this chic and trendy look everybody is "Ahhh-ing" for.. Distress but in a good way.. Check it out!
How to achieve the distressed look for less

Distressed boyfriend jeans are the key ingredient in achieving that "Oh,this old thing?" chic, off-duty look. But usually, that "old thing"—in particular, a pair of beautifully destroyed jeans—is not truly old. You'll have to make a trip to at least one store, or maybe a dozen. Which brings us to our next point: Those jeans are hardly easy to obtain.
First, finding a pair distressed to your personal liking can involve a tireless hunt. (Curiously resembling swiss cheese? Looking as if a bear had initiated a wrestling match? No thanks!) Then, once you do spot your perfect pair, the price tag immediately forces your eyes to widen in disbelief. Despite holes galore and thus, less fabric, the dollars and cents have noticeably increased. Catch-22, much?
Yep, it's time to take matters into your own, fully capable hands.
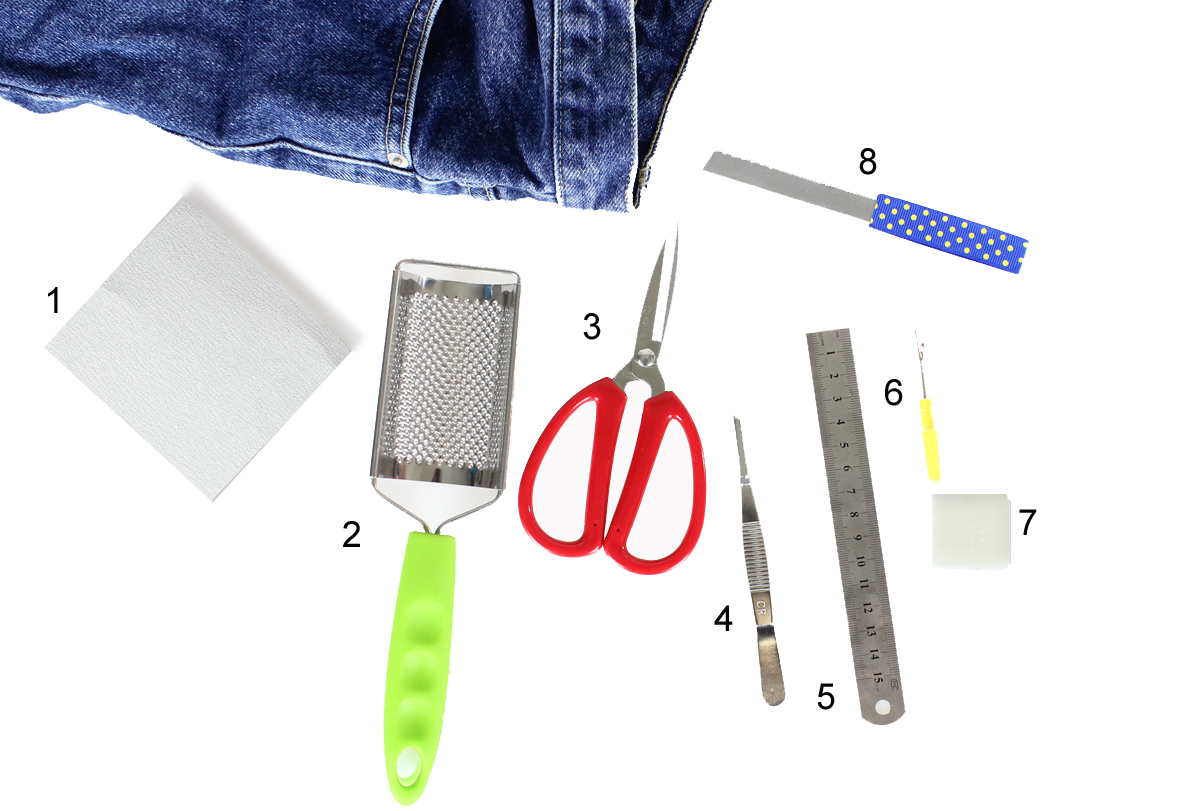
- Denim of choice—how about the faded jeans you couldn't bring yourself to toss when you cleaned out your closet? We also recommend going to your local thrift store or purchasing an inexpensive pair of jeans. If you decide to shop for denim but aren't having any luck, get creative like Kathleen did: She found this pair of cheaper denim in the men's section of Forever 21 (and prefers the baggier "boyfriend jeans" fit, anyway)!
- Cheese Grater (2)
- A sharp, brand new pair of scissors more specifically, sewing scissors (3) or seam ripper (6), or serrated knife (8)
- Tweezers (4)
- Sandpaper (1)
- Ruler (7)
- Pencil/chalk (7)
- Washing machine and dryer (optional/not shown)
Why go on the treasure hunt for all of these tools when you can purchase the DIY Distress Jeans Kit.
Directions
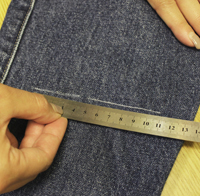
Step 1: First, try on the denim to have an idea of what areas you would like to distress. If you would prefer to make a mark rather than simply eyeball where on the jeans you intend to distress, use the ruler and then use the chalk or wax taylor chalk to mark the spot
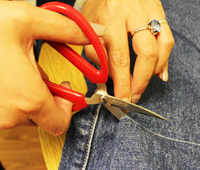
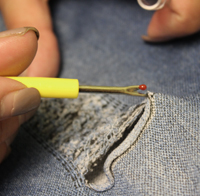
Step 2: Cut straight, horizontal slits over the areas you want to distress. The slits should be 1/2-inch to 3/4-inch from each other, which will make pulling out the indigo threads (i.e., the synthetic thread of the dyed and manufactured denim material) even easier. You can use different mediums to create different textures when cutting. ( scissors , seam ripper, or serrated knife)

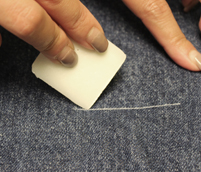
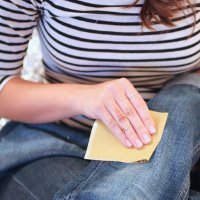
Step 3: Then, sandpaper over those areas for an extra worn look. Skip this step if you'd rather keep the distressing to a minimum.
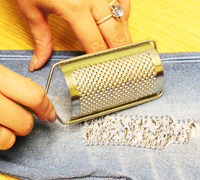
Step 4. The cheese grater works especially well. To use one of these tools, begin by rubbing it horizontally or vertically across the area of your jeans you wish to appear distressed. The degree of distress you want on your jeans will be determined by the degree you rub them with the distressing tool. More vigorous rubbing will produce more distressing.
Step 5: Use the tweezers to pull the indigo threads, but only in the areas you've cut. It's OK if you can't get them all, or if you have blue fuzz in certain areas. It'll all even out in the wash—pun intended!

Step 6: Once you've cut several areas (and don't forget about those back pockets for an all-over distressed look) and have pulled most of the indigo threads out, toss your jeans into the wash. Ensure that you have selected wash on cold, not warm or hot. You can always hand wash/air dry if you don't have a washing machine or a dryer nearby; however, the step does add fantastic further distressing.
Step 7: Afterward, dry them (in the dryer or via air drying) as much as you can before wearing.


Pull on the rest of your outfit and voilà! You're ready to rock n' roll.

Thank you for tuning Stay tuned for more fashionable sense.
Another blog that has great tips for DIY Distressing